DIY Coral Painted Lamp Shades: Transform Your Lamps in 5 Simple Steps
Give your space a fresh, trendy vibe with DIY coral painted lamp shades! Coral is a warm, happy color that instantly brightens any room — perfect for bedrooms, living rooms, or home offices. In this guide, I’ll show you exactly how to transform plain lamp shades into stunning décor pieces in just five easy steps.

Why Coral Painted Lamp Shades?
Coral is a unique color that strikes a balance between vibrant and soft, making it perfect for almost any space. Whether you want a bold statement piece or a subtle accent, coral can work with a wide range of styles — from modern minimalism to cozy farmhouse chic. Best of all, painting your lamp shades is budget-friendly and easy enough for any DIY beginner.
What You’ll Need
- Plain lamp shade (fabric or paper works best)
- Coral-colored acrylic or fabric paint
- Foam brush or soft paintbrush
- Painter’s tape (optional, for clean edges)
- Drop cloth or old newspaper
- Hairdryer or fan (to speed up drying, optional)
Step-by-Step Guide

- Step 1: Gather Materials
-
Start by collecting everything you’ll need so the process is smooth from beginning to end. Get a plain white or light-colored lamp shade, coral-colored acrylic or fabric paint, a foam brush or soft bristle brush, and painter’s tape for neat edges. Lay out old newspapers or a drop cloth to protect your work area from spills. Having gloves and an apron on hand will keep you mess-free.
- Step 2: Prepare Your Lamp Shade
-
Preparation is the secret to a smooth finish that looks professional. Wipe down your lamp shade with a slightly damp cloth to remove dust and dirt. If the surface is too shiny, lightly sand it with fine-grit sandpaper so the paint sticks better. Use painter’s tape to cover any metal parts or areas you don’t want painted, keeping the edges sharp and clean.
- Step 3: Apply the First Coat
-
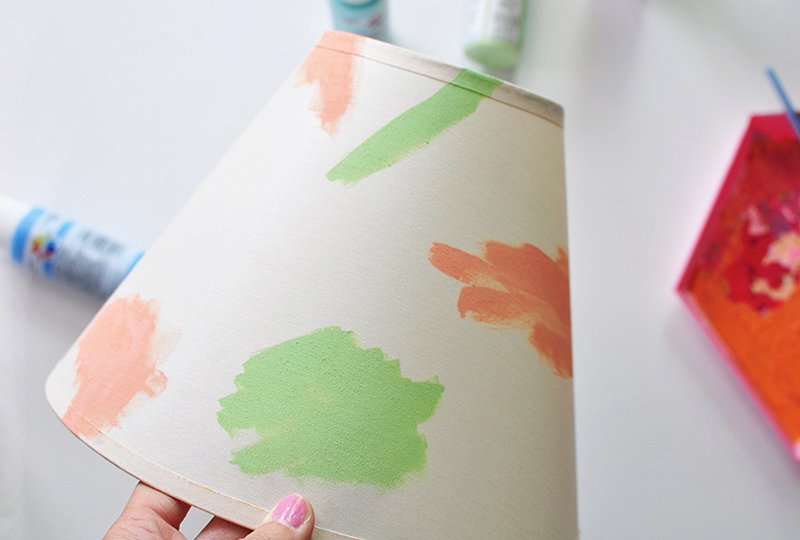
Now the fun part begins — painting! Use your foam brush to apply coral paint in smooth, even strokes, working from top to bottom. Allow the first coat to dry fully before adding a second layer, which helps deepen the color and create a uniform finish. If you prefer a bolder look, go ahead and apply a third coat once the previous one is completely dry.
- Step 4: Add a Second Coat
-
This step is where you can make your lamp shade truly unique. Try an ombre effect by blending coral into white or gold for a gradient finish. You can also use stencils to paint patterns like stripes, polka dots, or geometric shapes for a trendy look. For extra elegance, add metallic accents around the rim or base of the lamp shade.
- Step 5: Style Your Lamp
-
Once your lamp shade is dry, carefully remove the painter’s tape and reattach it to the lamp base. Place it in a spot where it can stand out, such as a side table, desk, or nightstand. Use warm lightbulbs to enhance the coral’s glow and create a cozy, welcoming atmosphere. Step back, admire your work, and enjoy the new personality it brings to your room.
Benefits of DIY Coral Painted Lamp Shades
- Budget-Friendly Home Makeover – Instead of buying new lamps, you can refresh your old ones at a fraction of the cost.
- Fully Customizable – Choose the perfect coral shade, finish (matte, glossy), or even patterns that match your décor.
- Quick and Easy Project – Can be done in less than an hour, making it a perfect weekend DIY task.
- Eco-Friendly Choice – Reusing and revamping old lamps keeps them out of landfills.
- Adds Personality – A coral lamp shade instantly becomes a stylish focal point in your room.
- Great for Beginners – No special tools or skills required — just paint and a brush.
FAQs
- 1. Can I use any type of paint for lamp shades?
Not all paints work well for lamp shades. It’s best to use acrylic, fabric, or specially formulated lamp shade paint because they adhere well and won’t peel or crack. Regular wall paint can make the shade too stiff or block light unevenly. - 2. Do I need to remove the lamp shade from the lamp before painting?
Yes, always remove the shade from the lamp before you start painting. This makes it easier to rotate and reach every angle while keeping paint off the lamp base. Place it on a flat, covered surface to avoid a mess. - 3. How long does it take for the paint to dry?
On average, paint takes 1–2 hours to dry between coats. For best results, let the lamp shade sit overnight before reattaching it to the lamp to ensure it is fully dry and won’t smudge.
- 4. Can I mix coral paint with other colors for a custom shade?
Yes! You can easily mix coral with white for a soft pastel shade or with gold/pink for a warmer look. Mixing colors allows you to create a shade that matches your room’s color palette perfectly. - 5. Will the paint affect the light coming through the shade?
Yes, thicker coats of paint or darker shades may slightly dim the light. Apply thin coats and let them dry completely before adding more if you want a softer glow without blocking too much light. - 6. Is this DIY project beginner-friendly?
Absolutely! Painting lamp shades is one of the easiest DIY home projects. It doesn’t require advanced skills, just some patience and a steady hand to get smooth, even results.
- 7. Can I add patterns or designs instead of a solid coral color?
Definitely! Use painter’s tape for clean stripes, stencils for geometric or floral patterns, or freehand designs for a more artistic look. This adds a unique, custom touch to your room décor. - 8. How do I protect my painted lamp shade from scratches or dust?
After the paint is fully dry, spray a light coat of clear acrylic sealer over the surface. This creates a protective layer that helps prevent scratches and makes it easier to wipe off dust.


